Showing posts with label wall art. Show all posts

Saturday, April 10, 2010

Spackled Fleur De Lis

I needed something above my kitchen sink. It is pretty boring looking at a blank wall. I mean, HELLO! I spend a lot of time there. I knew I wanted a Fleur De Lis and knew I wanted texture so I decided to use Spackle...it is what I had on hand. I drew out my Fleur De Lis and then I got cozy with my sink because I had to sit in it to work. Then I layered on the Spackle with my finger. I used a mini scraper to clean up any mistakes.
This is what it looked like before the paint

I let it dry for 24 hours and then I painted the Fleur De Lis with a metallic paint.

I then used a square plate I had and centered around the Fleur and then used a bowl to round out the sides. I don't know what this shape is called but I love it! (It is an actual shape...something fore)

So much better! I love the texture that the Spackle gave. It is nice that I was able to do this directly to the wall. They are demolishing these homes after we move out so they don't care what you do. My next house, if I do it again, I would probably do it on a wood piece or canvas.


Nicole
Linking up to A lovely Place To Land
and
Photobucket

Wednesday, April 7, 2010

My First Pottery Barn Knock Off

So, after looking at a few link parties today I discovered I was not the only one who fell in love with a huge clock in Pottery Barn's March issue.
I have wanted a BIG clock for a LONG time. Not going to happen anytime soon so I decided to make one myself!

Headed to Lowe's and got a piece of Birch wood...$4
Drew my circle, and then drew my Roman numerals. This was soooo tedious. If I had had a Cricut it would have gone so much faster (hint hint babe...birthday is coming up). Painted the numerals and then beat the crap out of it with a hammer to distress. Glazed, and then sanded.
I like it A LOT!!! Not sure if I will add clock hardware. I kind of like it as just a wall hanging.


Not sure where it is going to go yet. Maybe the kitchen....
Linking up to Someday Crafts
Nicole

Tuesday, April 6, 2010

Picture Ledge

I LOVE these pictures I just finished. They turned out great and the best part is that I got all the canvases on sale...a project total of $10!!!
Again...I found pictures I like online and then I got to drawing. After I painted the picture I made a glaze with some paint. You just add water to your paint until it is really runny. You then dab your loaded paintbrush on a paper towel to get most of the paint off and then apply the paint in criss cross strokes. I then get a paper towel and wipe most of it off. It gives it a nice washed out look. I then distressed the edges. Here is where it gets technical folks....you dab your finger in paint, wipe off excess and then brush along edges randomly. Yep...real difficult;)
Nicole H Signature Pictures, Images and Photos

Thursday, April 1, 2010

Nature Knock Offs!

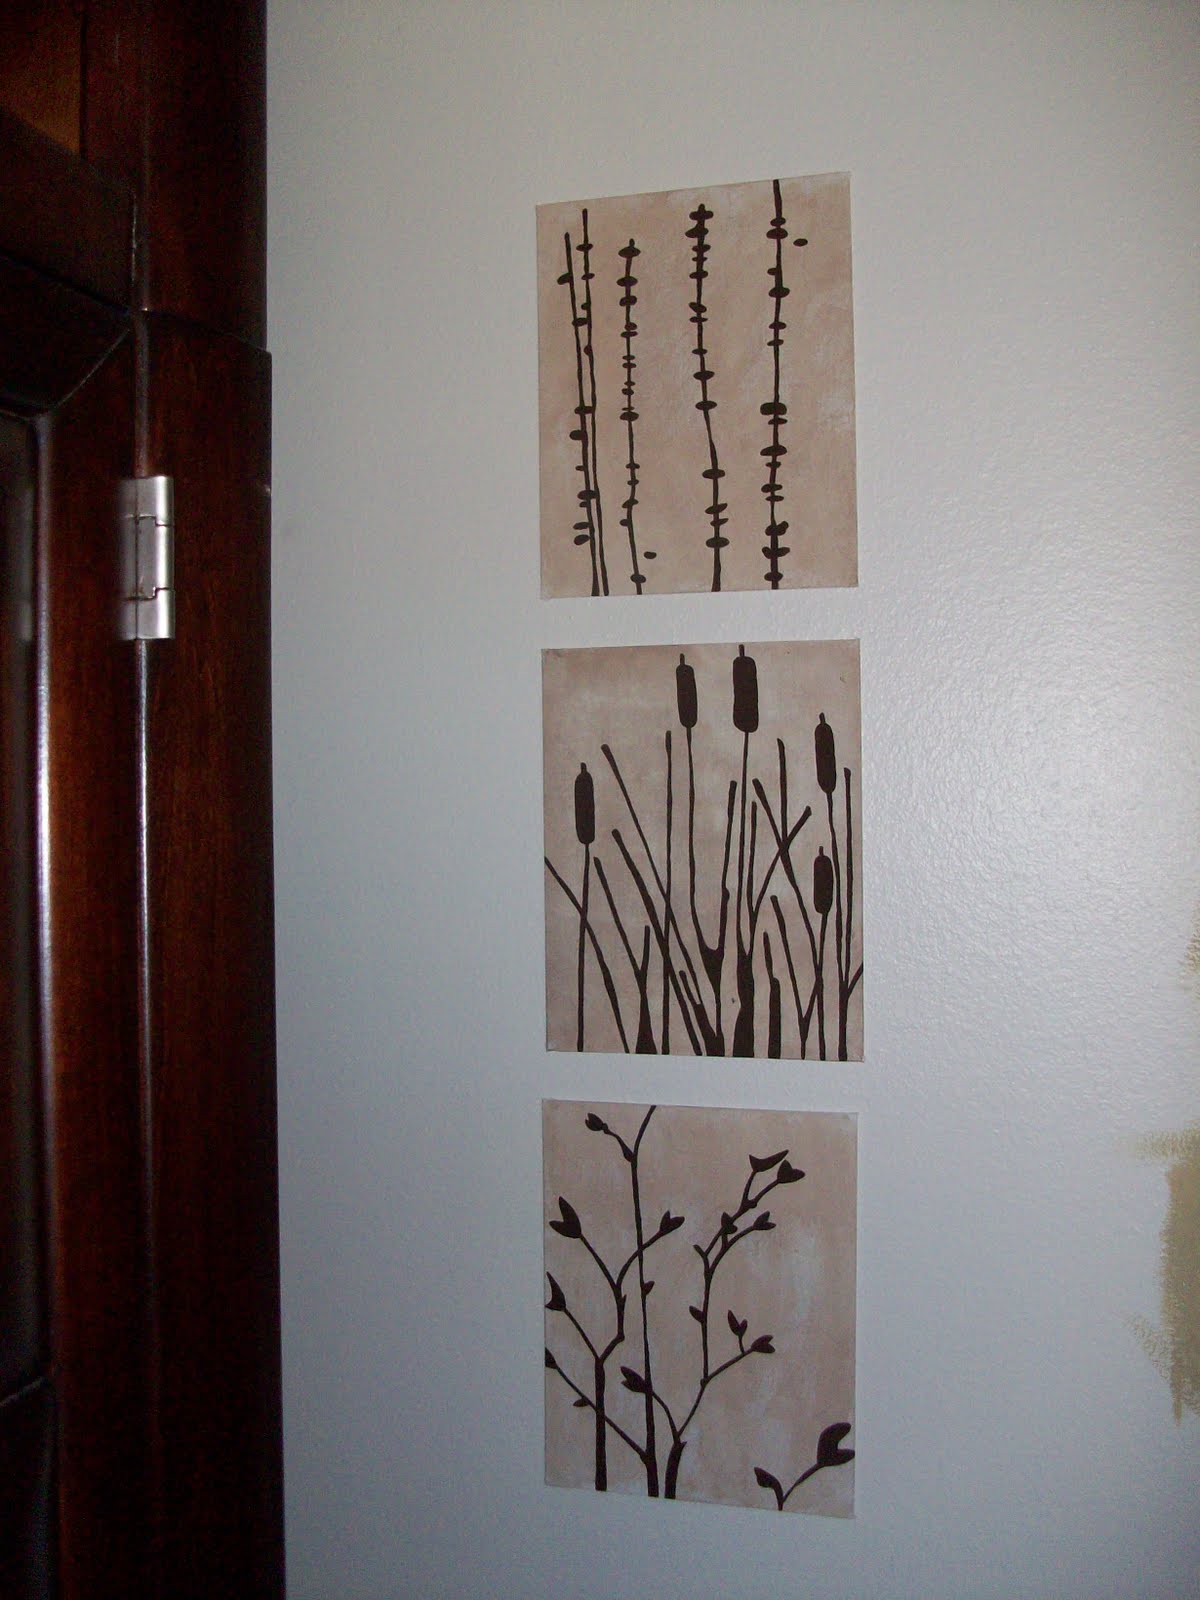
Ok, so it should be obvious by now...I am on a wall art kick. I have recieved inspiration from prints I see online and then I just draw them myself and then paint. I am by no stretch of the imagination an artist. In fact before the paint is put on, the drawings look a little scary. Painting them magically transforms them into something wonderful! So my suggestion is that when you are looking for new wall art, look online for ideas first and then try it yourself. It will save you a ton of money! All you need is a canvas, a pencil and paint! Oh and an eraser...used that a lot!
These large pictures are made from prints I saw online at Target. Wasn't going to spend $80 though! The little leaf pictures I actually bought a while ago, but it is actually something you could do quite easily. I had framed and matted pictures I wasn't liking anymore so I SPRAY PAINTED the frames white, distressed them a bit and then stuck my new print in them.

These I saw online and loved but again, didn't want to buy. They are just on a cardboard canvas. Not sure how I want to eventually hang them, but for now they are up like this. Gotta love my paint swatch to the side. Gotta fix that!
My taste in decor changes a lot. So now if I want to change something I won't feel guilty because I didn't spend a lot of money!
Give your drawing skills a try!

nicole signature Pictures, Images and Photos
Linking up to Someday Crafts

Ooh La La!!

A little wall art to spruce up my daughter's room. I found the template for the chandelier at decoart.com and went from there. Fancy!!
nicole signature Pictures, Images and Photos

Cheap...but cute...wall art!

I needed some wall art for my bathroom, and since money is tight, I pulled out my Cricut and made these two canvas's. I used the cartridge "Stretch Your Imagination" and picked the leaf template. I then cut it to the size I wanted with Vinyl. I made sure that I used the 'silouette' button on the Cricut so that I could get more of a stencil. I then placed it on my canvas (11x14 size) and then painted over it in Dark Burnt Umber. Be sure when you are painting it, that you paint in one direction only. Don't do strokes up and down. Once the paint dries, carefully remove your vinyl stencil, then enjoy.

I did both pictures for $5.19! I bought the Canvas at Michaels, using my 40% off coupon. But recently visiting Hobby Lobby, I saw that they sell 2 Canvas's for $5.99 and with a 40% off coupon, you've got yourself a bargain.
Now, I might do this with another stencil in some other rooms of mine!
♥Kristen♥

Thursday, March 25, 2010

Joining Forces!!

Thanks to my sweet sister in law Kathy..she is letting me join her here on her craft blog! I am excited!
So...a couple things I have done the past couple days...
It was my son's teacher's birthday so I decided to make her this wall hanging/plaque. I saw another version on Brown Paper Packages. They did a Family Values plaque. I might get to that someday. If you want to see their version go here.

I used a wood plaque, spray painted it black. I then distressed the edges with sandpaper. Then chose a paper palette. His teacher's favorite color is black so we chose black. I chose my wording, my fonts and sizes of papers and got to work. I inked the edges before gluing them down and then mod podged the whole thing. We drilled two holes in it so I could attach some tulle for hanging it up.

This morning right before I wrapped it up I noticed I put the word "understanding" twice! Nice! I had to do a quick fix before he took it to school today. I just added the word "example" on top of it.
My newest obsession is fabric flowers. I love them for embellishments for shirts, dresses, purses, even shoes. It is a simple flower...just a strip about 1 " wide and as long as you want. The longer the strip, the bigger the flower. You just do a running stitch and then gather it to form the flower. Then stitch to secure it through the middle. Add your center...a button or a bead. I sewed a small piece of felt on the back to give it a finished look then attached a bar pin so we can switch it out on different things. The edges are supposed to be frayed. I am still searching for more flower tutorials so stay tuned....